
How Can We Help?
EMS
< All Topics
Print
Adding Devices on the EMS Portal
Posted
Updated
This article will guide you on how to link a device connected to a Polar Gateway to the Polar Cloud. This will allow the Polar Cloud to remotely monitor the device connected and present this info remotely using your phone or PC.
This process can only be done once you have successully configured the following:
- REGISTER a Polar Cloud Account
- Setup a GROUP
- Setup a SITE
- Setup and configure the GATEWAY
If any of the above steps have not been completed please navigate to one of the steps to complete the setup correctly first before proceeding to add a device.
Add your device
Once the steps above are complete we need to add a device. This can be done navigating the the sites page from the home screen of the left hand menu
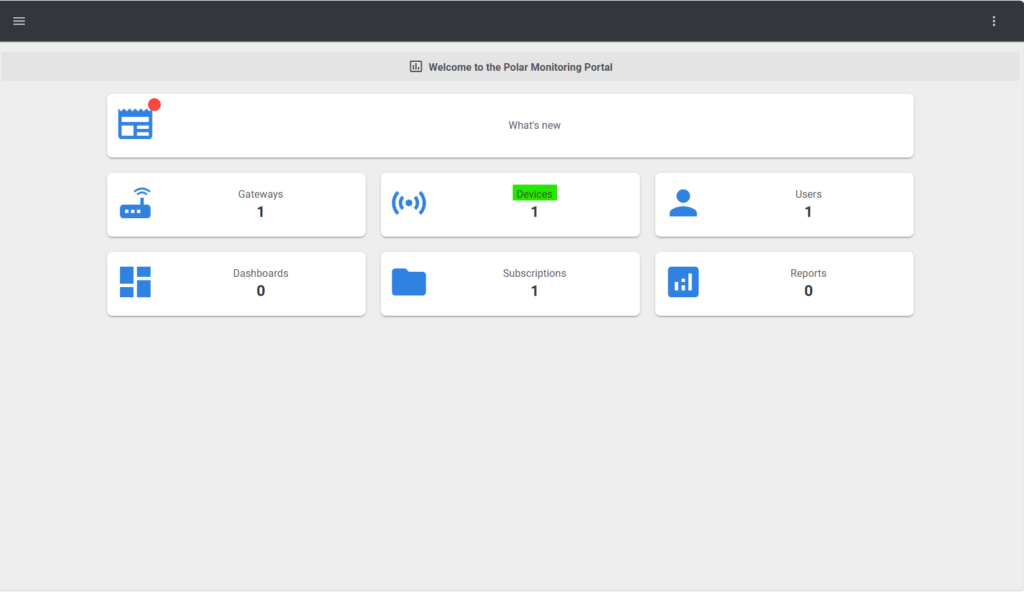
- In the top right hand corner, select Link Device.
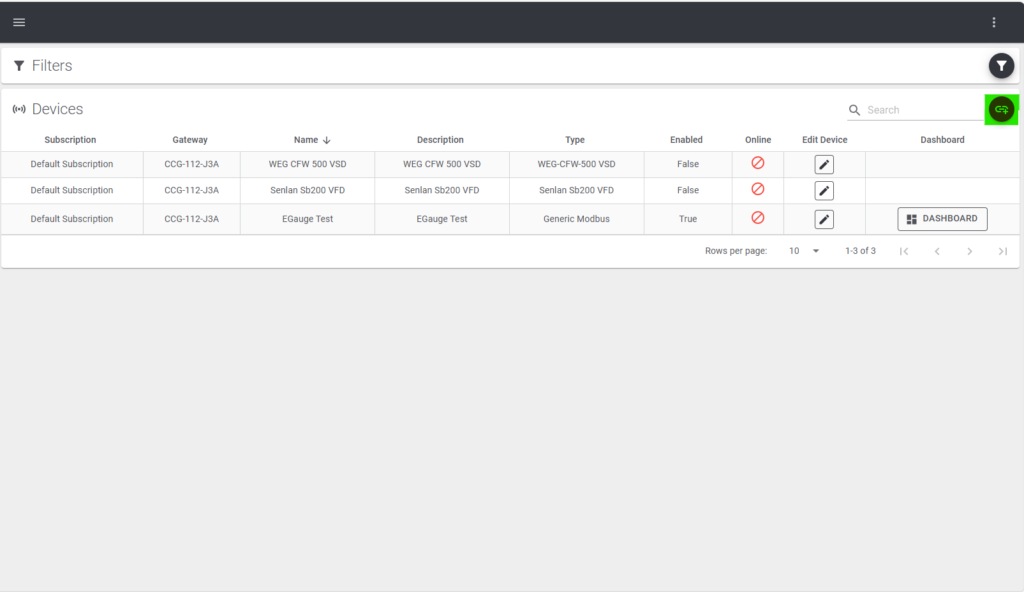
- Select the gateway you want to add the device to (You can search for the gateway using the last 3 characters of its serial ID).
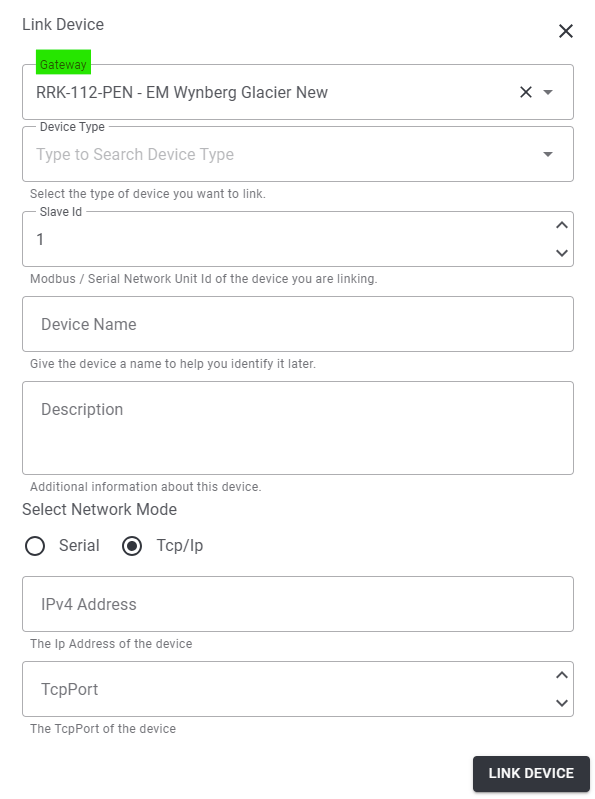
- Select the device type (E.g Growcol MPS Inverter)
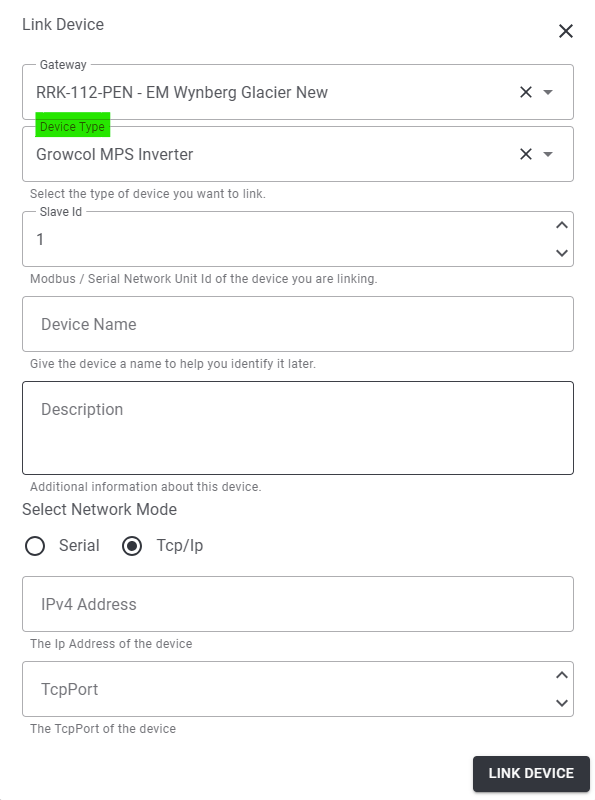
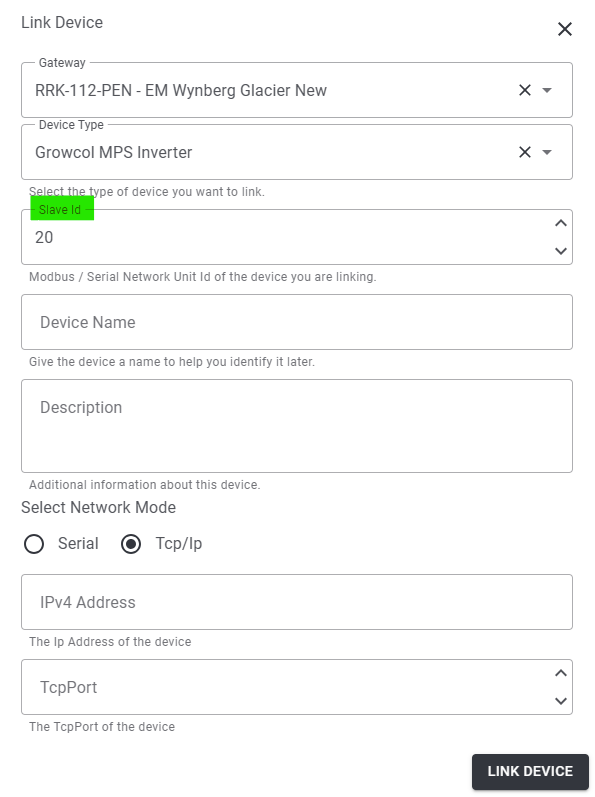
- Select the slave ID of the device.
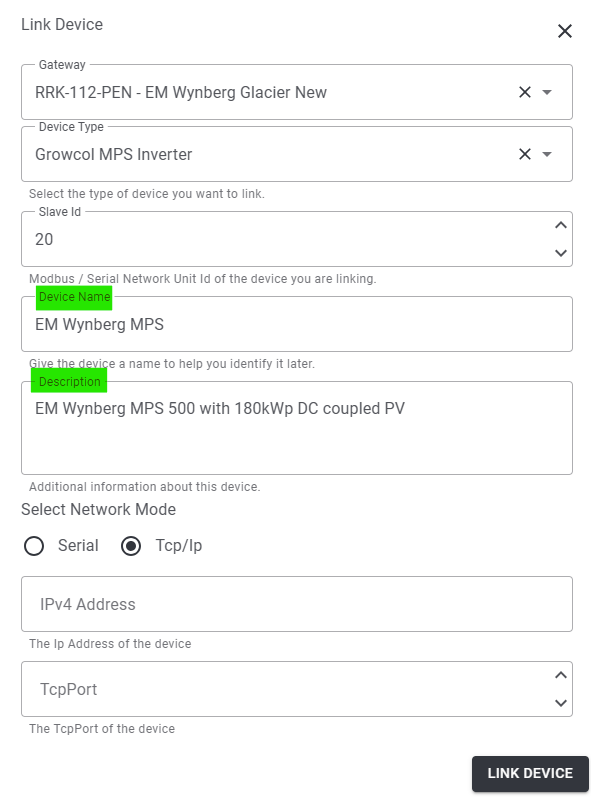
- Give the device a name and description E.G (‘EM Wynberg MPS’ and ‘MPS500 at EM Wynberg with 180kWp PV’)
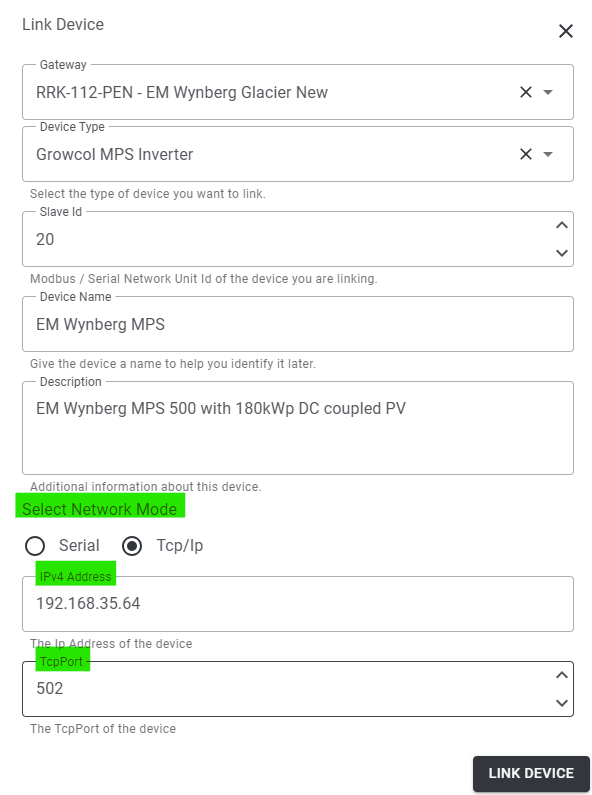
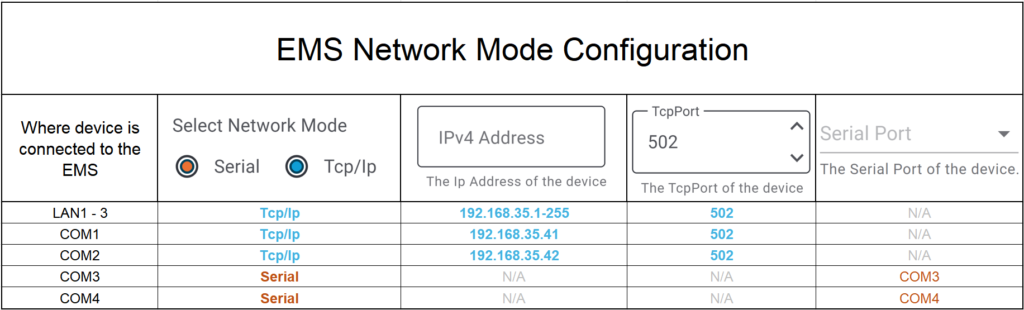
- Configure the network mode (refer to the “EMS Network Mode Configuration” table at end of page).
If you are using one of the ports labelled LAN1-3, use an IP address in the 192.168.35.1 – 255 range.- NB!! Please keep in mind the following IP Addresses are reserved and MUST NOT be used:
192.168.35.1 192.168.35.41 192.168.35.4 192.168.35.42 192.168.35.5 192.168.35.43
- NB!! Please keep in mind the following IP Addresses are reserved and MUST NOT be used:
EMS Network Mode Configuration Table:
2. View the device Dashboard.
- In order to view the device. You will need to click on the Dashboard button.

- If the device is correctly configured and wired into the panel and its’ network configuration has been set up then you will be able to read data from the device as seen below.
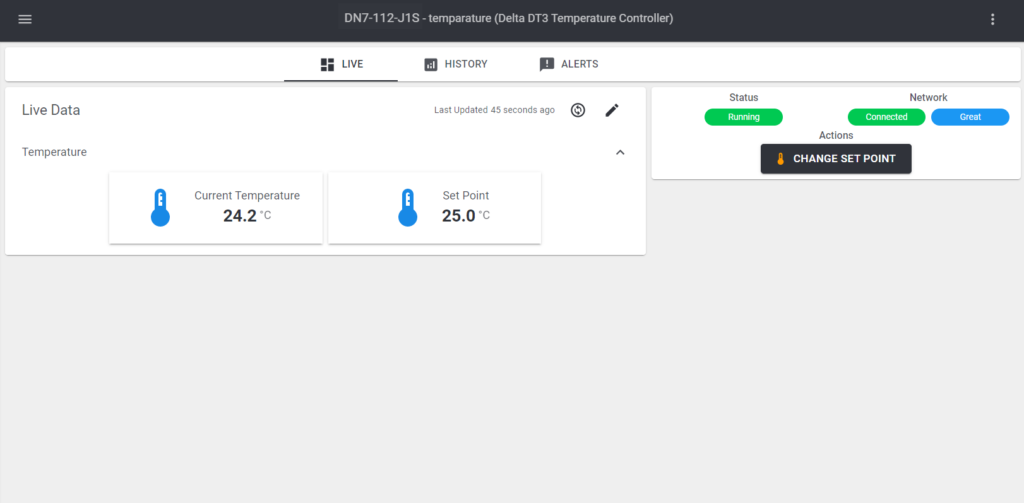
Table of Contents